
 story by Char VandermeerSigh. It’s that time of the year again—days are on the wane and winter is on its way. As much as I’d like to replace the contents of each container with a promising crop of hearty root vegetables, the Earth’s revolutions (and my neighbor’s bathroom addition) shelter my little blue roofdeck from most of the sun’s beneficial winter rays.
So while parsnips, carrots, radishes, kale and romanesco enjoy what’s left of the spotlight, a dozen other pots are ready for hibernation.
In all likelihood, one of the first questions you’ll ask yourself is, “Do I really need to dump all this wonderful and expensive potting soil into the trash?” If you want to get garden geeks going, just ask them whether or not you can reuse potting soil. The answers will range from a resounding “absolutely” to “absolutely not.” This gardener responds decisively: “Well, maybe. Probably. It depends.”
So, here’s the Shoots scoop: If your veggies suffered from disease (we’re not talking about nutrient deficiencies here, but old-fashioned fungi and bacterial issues), then fuhgedaboudit and ditch the dirt. If you’re uncomfortable dumping it in the nearest public park under the cover of darkness, find out the identity of your local park-tender and ask if they’d mind a donation. The soil will be fine for the neighborhood petunias—just make sure you don’t contaminate a vegetable garden with your refuse.
If you were blessed with a healthy crop this year and don’t feel moved to sterilize your soil, then remove all evidence of the previous tenant from the soil (dead leaves, root balls, root clusters and drainage material), pour a few kettles of boiling water over the mess (with any luck, it’ll kill any bugs that may be lingering), drain and dry.
Overachievers can also sterilize their used soil. Put it into deep baking pans, spreading evenly to a depth of four to five inches. Pre-heat your oven to 180 degrees and allow your dirt to bake for 30 minutes. You can also microwave the soil until it reaches the desired temperature. Make sure the soil doesn’t exceed 200 degrees; high heat produces toxins, rendering it useless. Allow the dirt to cool completely.
Dump the dried dirt into a big trash bin. When spring arrives, enrich your recycled soil with an equal quantity of fresh soil and generous servings of organic matter, such as compost or worm castings.
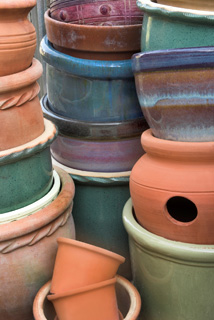
Now, haul those containers inside (especially those pretty terra cotta and ceramic planters; they’ll burst if we have another winter like last year’s), rinse out as much dirt as possible and soak them in a 10 percent bleach solution for 30 minutes. If you’re not too keen on bleach, you can scrub them with hot, soapy water and hope for the best.
After that, it’s just a matter of crossing your fingers and waiting for the first seed catalogues to appear in your mailbox.